Clarinet Reed Making
Planing/Gouging

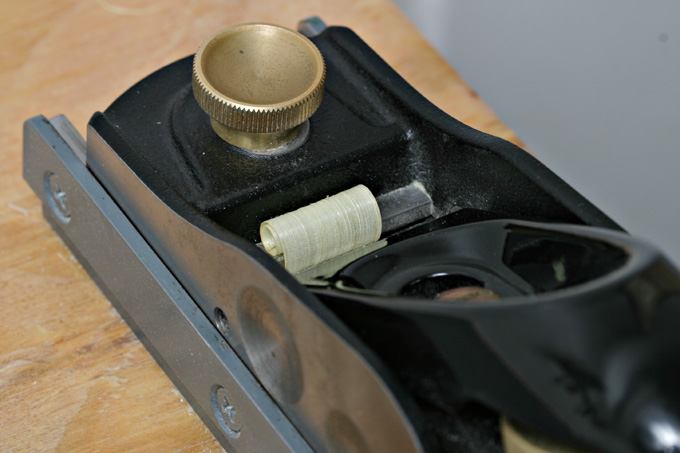
Planer removing cane.
Once the cane cut to size, it now has to be made perfectly flat. Planing is often where many reed makers run into big problems, often because their blades are not sharp enough to smoothly remove only the thinnest ribbons of cane.
Planing Technique
Ideally the planer should be secured firmly to the table’s surface to allow for the smoothest cutting motion. Some planers can be secured with screws or clamps.
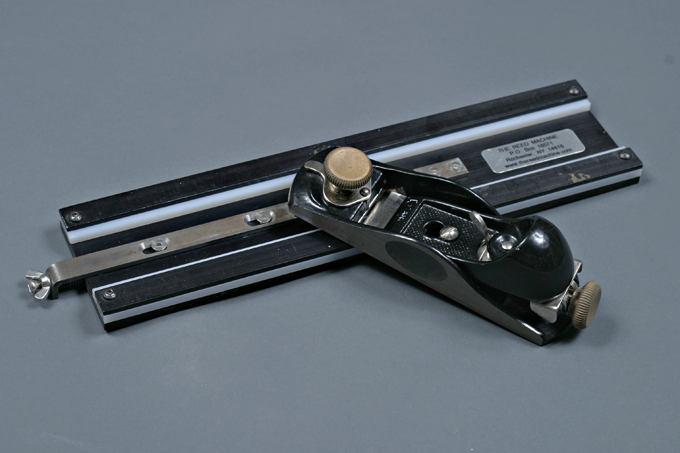
Standard planers are comprised of a base piece that holds the cane in place and has a track that the block plane slides along. The other element is the block plane itself. Knowing how to adjust and setup the block plane is critical. There is tons of great info online. Here’s one guide to get you started.
The most common mistake is adjusting the blade depth in the block plane while planing. Some reed makers even use the blade depth to control reed thickness. This is problematic for two reasons. First it does not yield accurate and repeatable results. Second if the shavings being removed are too thick, some cane will be torn off rather then smoothly cut, making it impossible to achieve a perfectly flat surface.
The blade depth should remain the same at all times. This will ensure smooth cutting and consistent blank thickness when the planing is done. An easy way to find the proper blade depth is to protrude the blade just slightly past the opening and then begin planing. From there retract the blade little by little back into the mouth of the plane until you are achieving feathery thin shavings. These shavings should measure around 0.04mm. Anything much thicker and smooth cutting becomes very difficult, anything much thinner and the blade will stutter along on the cane. For the proper results it’s imperative that the blade is properly sharpened. If the blade is not sharp enough or the shavings are too thick you will have to use excessive downward pressure to cut though the cane and perfectly flat results will become impossible. Keep planing until no more material comes off. This will ensure that your blanks are being cut to the same thickness each time. If the blade is sharp enough, the final strokes will be removing cane dust only. These final strokes are critical to ensuring that your blank will be as flat as possible off the planer.
To speed up the process I use two block planes. First a lower quality plane set to take off slightly thicker shavings. As I get closer to finishing I switch to my Lee Valley plane. This also reduces the wear on the Veritas blade. This planing process takes less than two minutes per reed.
Once you are done check your work with calipers. If you are aiming for 2.90mm blanks, measure many points along the reed. Because of natural imperfections on the bark, you will get some variance along the reed but you should be close to your desired measurements.
I have come to the realization that getting perfectly flat blanks right off of the planer is often not possible even with the best tools because of the imperfect nature of cane. Some finishing work on sand paper will always be required, but the goal is to get flat enough results to where this is very minimal.
Careful cane selection is also key for getting good results. For example if a piece of cane has a wide diameter it may ride higher in the holding chamber of the planer and it will result in a thinner blank than desired. If the cane is twisted slightly or curved at one end, this will also adversely affect the results. Take care to select only the straightest pieces of cane and also rock them from end to end on a piece of glass after you cut them to length to check for flatness. Discard anything that is not ideal.
Choosing a blank thickness (again!)
In the section on selecting cane I highlighted the relationship of cane density to it’s location in the cane wall. To review, cane closer to the bark is harder and cane farther from the bark is softer. This is contrary to many players first instincts with reeds. In an attempt to get a bigger sound some players make very thick blanks but the result is often a reed with very little resilience because the cane in the reed vamp and tip is very far from the bark, thus less dense or too soft to be an effective reed.
Blank thickness can make or break a reed. My cane of choice right now is lousy as a thick blank, lacking clarity of sound and has a terrible response. But at the right thickness the sound comes into focus and offers great response. Consistency in thickness is critical to knowing whether your approach is working or not. I recommend measuring your favorite style of reed and use that blank thickness as a baseline and experiment from there.
Planer Models
 The Reed Machine Planer by Robert Dilutis
Robert Dilutis makes a simple plane that comes with a Stanley Block plane. With proper sharpening and calibration this tool can yield near perfectly flat reeds. Reed thickness is controlled by building up tape on the surface of the planer that the blank rests on.
I have made some modifications to my Dilutis planer to improve it’s performance. I replaced the original tightening screw with a wingnut screw. It makes tighting much faster and it’s easier on your fingers. It originally comes with two metal strips for the reed to rest on. I’ve removed those to metal strips and used the resulting holes to screw the plane jig directly into my workbench. Alternately you could fasten it to a table or bench with C clamps. Securing the plane eliminates wasted motion and makes it easier to make smooth strokes.
With the proper attention to detail and sharpening, the Dilutis will produce near perfectly flat reeds. They will still require some sanding to work out imperfections, but it gets you quite close. The performance of the machine can probably be further improved by investing in a better block plane. If you decide to upgrade the block plane, be sure it’s width is compatible with the planer.
.
.
 Precision Music Products Planer by Greg James
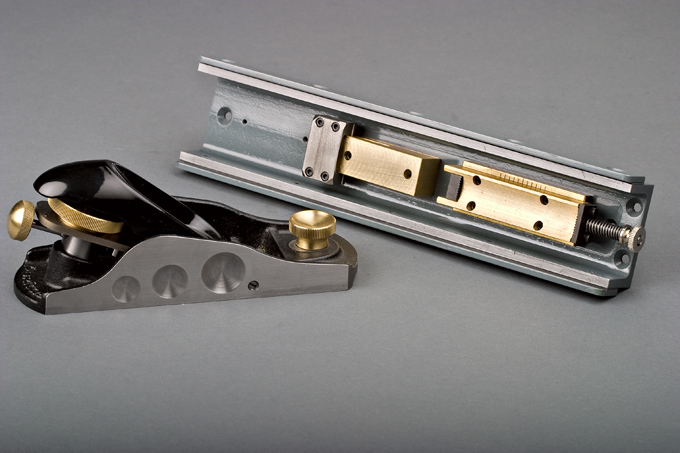
Greg James makes a more expensive planer that is constructed entirely steel and brass. It also incorporates a first cut jig which quickly and evenly removes bark from the vamp of the reed after planing.
His planers are built to order and can accommodate different brands of block planes if requested. I recommend the Veritas Low Angle Block Plane. The advantages of this high cost block plane are many. The precision ground sole is absolutely flat, very thick, and will allow no warping as the blade is tightened. The blade adjustments are finer and easier to control. There are two adjustment screws near the mouth precisely center the blade, critical for flat results. The blade itself is made of a high grade A2 tool steel which holds an edge better and longer than cheaper steels.
There are a few nice design features in this planer. First, the holding mechanism for the piece of cane is spring operated, no need to screw and unscrew each reed into place. You simply push in the screw to open the mouth and the cane is held tightly by the spring. Secondly, James has build in an easy and accurate way to control blank thickness. Under the brass plate that holds the reed is another plate that is on a slant. By moving this lower plate forward or back you can adjust the overall thickness(adjustable from about 2.5mm to 4mm). There are lines etched in the brass to help you keep track of the setting you like. The planer comes with mounting screws to secure it to your workbench. Alternately, Greg James recommends clamps, but clamping this unit would be awkward at best.
Another great feature of this planer is the first cut jig. The first cut jig makes the initial cut into the bark. It’s located on the planer below the main cane holder. The blank is held in place by sliding the silver metal bar up. It holds the blank at an angle so when you cut with the block plane it creates a smooth first cut on the vamp of the of reed. The first cut jig works well, it’s much faster and safer than cutting the bark by hand.
Overall this planer is a big improvement in my workflow. I’ve cut my planing time down to about two minutes including first cut jig and I get a more consistent result. I was hoping it would be able to produce perfectly flat reeds with almost no need for sanding however this is not the case. They come off a little flatter than the Dilutis and the thickness from blank to blank is more consistent. They still need some finishing work with glass and sandpaper but generally very little.
Reeds ‘n Stuff Planer
 Reeds ‘n Stuff makes a planing device that is along the lines of a bassoon gouger. Blank thickness is controlled by moving the entire cane holder back and forth along a track which is on a slant(much like the James). There are millimeter etchings along the track that you can guide to. The cane is locked into place by tightening a screw. The screw is large enough and fairly easy to tighten but it is awkwardly located with no clearance under it . The blade is replaceable and double sided, so when one side wears out, you can remove it and flip it to the new side. An adjustment screw controls the depth that the blade can cut. If the shavings are too thick, you will have a hard time getting smooth cuts. Aim for shavings around 0.04mm. The cutting arm slides back and forth along a metal rail. The cutting begins at a slight angle, but slowly becomes parallel as you continue cutting. When the blade is completely parallel, it is held in place by a roller which stops further cutting and the reed is now flat. The construction of this planer is very solid, you can really go to town without fear of over doing it. The results are very flat blanks, but still require some finishing on samdpaper.


